
// Creative Agency
HubSpot Website Integration: 2026 Step-by-Step Guide

Integrating your website with HubSpot comes down to four jobs: install the tracking code on every page, get your forms to send submissions into HubSpot, add chat or meeting tools if you want them, and test that each lead actually lands in your CRM. Each job is simple on its own. The trouble is that a missed domain setting or a duplicate script can make leads vanish without any error message. This guide walks through the whole setup, shows where it breaks, and explains where a development team such as ours saves you the rework.
TL;DR
- HubSpot’s tracking code is added automatically to pages hosted on HubSpot, but you must install it by hand on any externally hosted site.
- Forms reach HubSpot through an embed code, a HubSpot plugin or app, or the non-HubSpot forms tool. Each method has rules that can silently block submissions.
- Add every domain and subdomain you use to HubSpot’s tracking settings, or form submissions from those domains can be filtered out as spam.
- WordPress and Webflow each have an official connection method, so you rarely need custom code.
- Always test in a private browser window and check that a real contact record appears before you send traffic or ad spend to the site.
Table of Contents
- What a HubSpot website integration actually does
- Prepare before you touch the site
- Step 1: Install the HubSpot tracking code
- Step 2: Connect your forms
- Step 3: WordPress, Webflow and other platforms
- Step 4: Add chat and meeting tools
- Step 5: Test the integration
- What this setup costs in time and risk
- Our perspective
- Get the integration built and kept working
- FAQ
- Sources
What a HubSpot website integration actually does
HubSpot is a CRM, a customer relationship management system: the place where your contacts, deals and marketing activity are stored. Your website is where most of those contacts first show up. Integration is the plumbing between the two, so that a visitor who fills in a form becomes a contact record, and so that you can see which pages that person viewed before they got in touch.
There are two broad setups. HubSpot’s own guide to building a website explains that you can host the whole site on HubSpot’s CMS, or only parts of it, such as landing pages or a blog. Most small and mid-sized businesses already have a site on WordPress, Webflow or another platform, so they keep it and connect it to HubSpot. That second setup is what this article covers.
One point trips up many first-timers. HubSpot’s documentation says the tracking code does not create or install forms. It helps HubSpot recognize your site, tracks HubSpot and non-HubSpot form submissions, and can enable live chat widgets. Forms are a separate step.
If you want a broader view of how a CRM fits a services business, there is a HubSpot CRM overview for businesses that covers what the tracking code makes possible. For a small-business view of the same problem, our own CRM and website playbook covers plugins and when to scale up.
Prepare before you touch the site
A clean setup starts with a short checklist. Skipping it is how teams end up with two tracking scripts or a broken form that nobody notices for weeks.
- Confirm who has access. You need permission in HubSpot to view the tracking code, which usually means an admin account or marketing settings access. For WordPress, the plugin route needs a HubSpot Super Admin and a WordPress admin role.
- Know where code can be added. You need access to the site header, a theme file, or a tag manager (a tool that loads scripts on your pages without editing the site’s code).
- List every domain. Include your main domain,
www, and any subdomains such as a booking or shop subdomain. You will register each one in HubSpot. - Decide on cookie consent. If you have visitors from regions with strict consent rules, decide whether tracking should wait until the visitor agrees. Set this up in HubSpot’s privacy and consent settings before launch, and check HubSpot’s current documentation for how your banner interacts with the tracking cookie.
- Check for existing installs. Look for a plugin, theme setting or tag manager container that already loads HubSpot. HubSpot warns that when more than one tracking code is on a page, only the first to load fires.
- Decide which forms matter. Contact, quote request, newsletter and booking forms are the usual ones. Each needs a connection method, covered below.
If you are also planning a redesign, do this integration work after the new structure is settled, not before. Moving URLs after tracking is configured means reconfiguring goals and reports.
Step 1: Install the HubSpot tracking code
The tracking code is a snippet of JavaScript unique to your HubSpot account. On pages hosted by HubSpot it is already there. On an external site, per HubSpot’s tracking code instructions, you copy it from Settings, then Tracking & Analytics, then Tracking Code (free and Marketing Starter accounts find it under Tracking Code in the sidebar). You paste it before the closing </head> tag on each page, or a developer adds it once in a shared header or footer file so it loads site-wide.
Where it goes wrong:
- Page-by-page pasting. Adding the code to individual pages leaves gaps. A shared header file or the platform’s site-wide custom code field is safer.
- Duplicate codes. A plugin plus a manual paste means one of them is ignored, and your reports may be confusing.
- Unsupported setups. HubSpot notes the code is not supported on AMP pages, and ad blockers can interfere with tracking, so your numbers will always be slightly lower than real traffic.
Register your domains
This is the step people forget. After installing the code on an external site, HubSpot’s site tracking guide tells you to add each external domain and subdomain under Tracking & Analytics, then Advanced Tracking, then Additional site domains. It also states that since May 16, 2024, form submissions from external domains you have not added are filtered to spam. In practice that means a form can look perfect on your site while every lead is quietly discarded.
Step 2: Connect your forms
Forms are where integration earns its keep. HubSpot gives you three main routes for an external site.
| Method | How it works | Best for |
|---|---|---|
| HubSpot embed code | You build the form in HubSpot and paste its embed code into the page. Submissions sync to your account. | Most contact, quote and download forms |
| Standalone form link | HubSpot hosts the form page and you link to it. | Quick campaigns, email and social links |
| Non-HubSpot forms tool | HubSpot reads submissions from forms your site already has. | Existing forms you do not want to rebuild |
The embed route is described in HubSpot’s guide to styling and embedding forms on an external site. The same page repeats the domain rule: your site domain must be in the tracking settings or submissions are marked as spam.
HubSpot’s developer documentation adds an important rule: forms should only be loaded through HubSpot-hosted JavaScript. Self-hosting a copy of the embed code is unsupported, because security, anti-spam and performance updates will not reach your copy.
The non-HubSpot forms tool has strict limits
The tool that captures submissions from forms you already have sounds like a shortcut, but the non-HubSpot forms documentation sets conditions. It works by identifying the HTML form tag, and a form needs an email field and a standard submit button. It cannot have JavaScript bound to the submit event or hidden fields, and it does not work on single-page apps. Each account is capped at 10,000 non-HubSpot forms. If your site uses a custom form builder with scripted submission, the embed route is the more dependable choice.
Conversion is a separate question from capture. A form that sends data perfectly can still turn away visitors with too many fields. Our guide on building web forms that convert covers layout and field decisions.
Map fields to contact properties
Every form field should match a HubSpot contact property (a data field such as first name, phone or company). If your form asks for “Business size” and HubSpot has no matching property, create one before launch so the answer is stored instead of lost. Keep names consistent across forms so reports stay readable.
Step 3: WordPress, Webflow and other platforms
WordPress
HubSpot’s WordPress plugin guide says to install the HubSpot All-In-One Marketing plugin. It adds the tracking code automatically and gives you access to forms, live chat, emails, segments and reports. It requires Super Admin access in HubSpot, a WordPress admin role, and a WordPress.org or WordPress.com Business site.
The typical path is: in the WordPress dashboard open Plugins, then Add New, search for the HubSpot plugin, install, activate, and sign in to your HubSpot account. Because the plugin handles the tracking code, do not paste a second copy by hand.
Plugins add weight to a site, and heavy sites slow down. If you run a WordPress site that has to stay fast while you add marketing tools, our WordPress hosting and maintenance plans start at $39 per month for dedicated hosting and $99 per month for maintenance. Our WordPress performance monitoring guide shows seven metrics to watch after any new script goes live.
Webflow
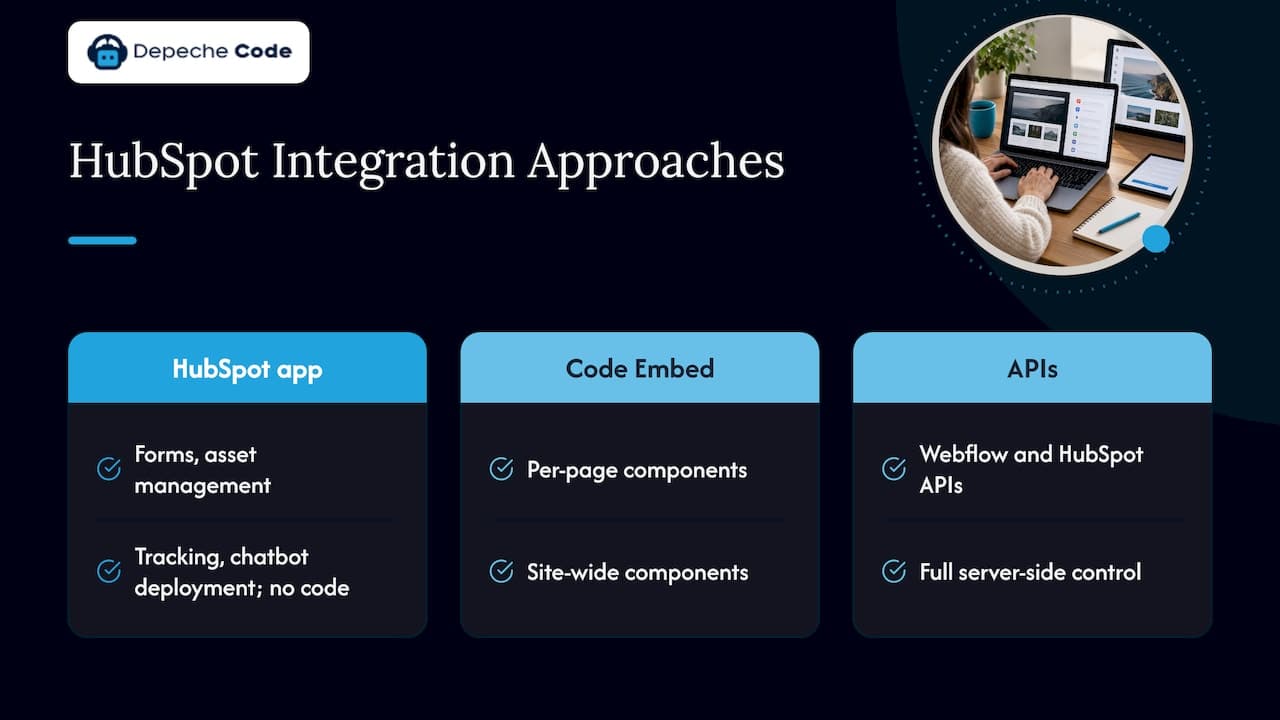
Webflow’s HubSpot integration page describes three approaches: the HubSpot app for form embedding, asset management, site tracking and chatbot deployment without code; Code Embed elements for per-page or site-wide components; and the Webflow and HubSpot APIs for full server-side control. It notes most implementations combine two or more methods. Webflow’s help center adds that when authorizing the app you connect individual sites, not the whole Workspace.
Custom or other platforms
For a custom-built site or another CMS, the generic route applies: the tracking code in the shared header, embedded HubSpot forms on each page, and domains registered in HubSpot. If your site is a single-page app, plan on embed code or API work rather than the non-HubSpot forms tool.
Step 4: Add chat and meeting tools
Chat is optional, but it is the feature most businesses want after forms. HubSpot’s live chat instructions say to create a website chatflow under Service, then Chatflows, choose an inbox, set the welcome message and offline behavior, and publish. Live chat appears as a widget on your pages, and on an external site it will not appear until the tracking code is installed. Knowledge base search inside chat requires Service Hub Professional or Enterprise.
On Webflow, per the integration guide, you build the chatflow in HubSpot, copy the embed code and paste it into Site Settings, then Custom Code, then Footer Code. Targeting and triggers stay in HubSpot. Meeting schedulers embed through HubSpot’s calendar widget code, and bookings sync to the CRM automatically.
HubSpot chat is staffed chat: someone has to answer. If you want a chatbot that handles common questions on your WordPress site, we integrate AI chatbots, with plans from $49 per month (Starter), $99 per month (Growth) and $149 per month (Prime), plus a one-off $299 setup and integration fee. You can see the details on our AI chatbot services page, and our WordPress chatbot guide compares five integration methods.

Step 5: Test the integration
Do not trust the green checkmark in a plugin. Run this test before launch and again after any site update.
- Open a private browser window with no extensions, and visit your site.
- Submit each form with a test email address you control.
- Check HubSpot. A contact record should appear, with the form listed in its activity and the page it came from.
- Check page views. The test contact’s timeline should show the pages you visited.
- Test the standalone form link. If the form works on its HubSpot-hosted link but not on your site, the problem is on the site side, such as a script conflict or a browser setting.
- Test on mobile and on a second browser.
- Check the chat widget, if used, loads and routes to the right inbox.
Common failures and their usual causes
| Symptom | Likely cause | Fix |
|---|---|---|
| Form submits but no contact appears | Domain not added in Additional site domains | Add the domain and subdomain, retest |
| Page views missing | Tracking code absent or duplicated | Check the header and plugins for one copy |
| Chat widget not showing | Tracking code not installed on that site | Install it, then republish the chatflow |
| Form answers missing in the contact | Field not mapped to a contact property | Create or map the property |
| Existing form not captured | Form uses hidden fields or scripted submit | Switch to the HubSpot embed |
| Intermittent loss | Consent banner or ad blocker blocking cookies | Review consent settings and test with and without the banner accepted |
If you use a connected app or API instead of the plugin, authentication errors (HTTP 401 or 403) usually mean an expired token or a missing permission on the connected app.
What this setup costs in time and risk
A basic integration of one plugin and one or two forms is a short job for someone who has done it before. The risk is not the install, it is the silent failure afterward: a theme update that drops the header code, a new subdomain nobody registered, a redesigned form that no longer matches a property. Each of those costs leads you never see.
That is why ownership matters. Someone should be responsible for the site, the tracking and the forms together. When the website is maintained by one team and the CRM by another, problems fall in the gap between them.
Our perspective
Most integration problems we would expect to see are not about HubSpot itself. They come from the site: a duplicate script, an unregistered domain, a form rebuilt without anyone telling the person who owns the CRM.
That is why we build and maintain the website and the lead capture as one piece of work. Our team handles website development, redesigns, WordPress hosting and maintenance, SEO and AI chatbot integration, so the people who change the site are the same people who know what the forms and tracking depend on.
We deliver quickly using in-house directed AI, we hand over transparent ownership of everything we build, and we measure technical performance with Google PageSpeed and SEO scores. For a business owner, the practical result is a site that captures leads reliably and stays fast after the marketing tools are added.
If you want the CRM to sit alongside the site, we also offer Depeche CRM. If HubSpot is your choice, we will connect it properly and keep it working.
Donovan Wells - Founder and CEO
Get the integration built and kept working
If you would rather not spend your week in tracking settings and DNS records, we can build the connection for you as part of a new site, a redesign or ongoing maintenance. Our team works from Orlando and serves businesses across the United States.

See everything we offer on our services page, or if your site is changing shape, start with our website design and redesign page so the integration is planned in from the beginning.
FAQ
Do I need to host my website on HubSpot to integrate it?
No. HubSpot lets you host a whole site, or only parts such as landing pages or a blog, but an existing site on WordPress, Webflow or another platform can connect through the tracking code, embedded forms or a plugin. Hosting on HubSpot is a choice, not a requirement.
Why are my form submissions not showing up in HubSpot?
The most common cause is a domain that has not been added under Additional site domains in Tracking & Analytics. HubSpot filters submissions from unregistered external domains to spam. Other causes are a form with unmapped fields, a duplicate tracking code, or a consent banner or ad blocker blocking the tracking cookie.
What is the easiest way to connect HubSpot to WordPress?
Install the HubSpot All-In-One Marketing plugin and sign in with your HubSpot account. It adds the tracking code automatically and gives you forms, live chat and reports inside WordPress. You need a HubSpot Super Admin and a WordPress admin role to complete it.
Can I keep my existing forms?
Sometimes. HubSpot’s non-HubSpot forms tool can read standard HTML forms with an email field and a regular submit button. Forms with hidden fields, scripted submission or a single-page app setup need the HubSpot embed code instead.
Sources
- HubSpot: Build a website
- HubSpot: Install the HubSpot tracking code
- HubSpot: Set up site tracking
- HubSpot: Style and embed HubSpot forms on an external site
- HubSpot Developers: Forms module
- HubSpot: Use non-HubSpot forms
- HubSpot: Install and use the HubSpot WordPress plugin
- Webflow: Integrate HubSpot with Webflow
- Webflow Help Center: Install and use the HubSpot App
- HubSpot: Create a live chat