
TL;DR:
- Following a structured, seven-step website update process—request, backup, staging, testing, deploying, verifying, and documenting—reduces downtime and safeguards conversions. Regularly auditing pages with a content inventory and scoring helps prioritize critical updates, while clear ownership and approval gates ensure accountability. Implementing a disciplined deployment lifecycle, supported by monitoring tools and a contingency plan, protects site performance and revenue.
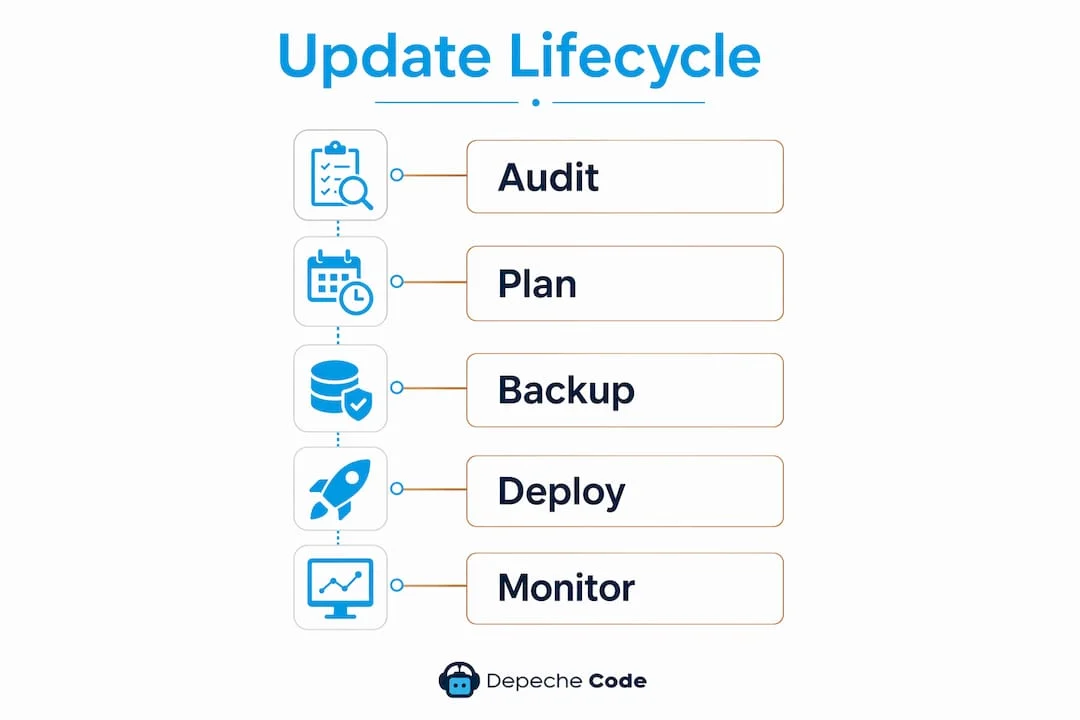
Run website updates as a controlled operation: request → backup → staging → deploy → verify → monitor → document. Teams that follow this sequence with Google Search Console, Core Web Vitals monitoring, and a named rollback owner cut unplanned downtime and protect conversion paths. Depechecode uses this exact lifecycle with clients across industries. Here is the full process, ready to copy.
The 7-step process at a glance:
- Request: Log the change with a ticket, risk level, and rollback owner
- Backup: Create a full backup and run a restore test before touching production
- Stage: Apply changes to a staging clone of production
- Test: Check forms, checkout, analytics tags, mobile layout, and SEO signals
- Deploy: Push during a low-traffic window with a rollback plan ready
- Verify: Confirm critical paths, conversion events, and uptime within 30 minutes
- Document: Update the change log with date, owner, summary, and verification results
Pro Tip: Set a calendar reminder to run a restore test monthly, not just after a backup completes. A backup you have never restored is an assumption, not insurance.
Table of Contents
- How do you audit and prioritize pages that need updates?
- How do you plan releases, assign owners, and set approval gates?
- What does a professional deployment lifecycle look like?
- What should you check before publishing any site change?
- How do you monitor updates and measure their impact?
- Which tools and automation workflows actually scale maintenance?
- What does a ready-to-use update checklist look like?
- How should you handle security during website updates?
- How do you keep stakeholders informed during the update process?
- What are the best practices for version control and change tracking?
- What is your contingency plan when an update fails?
- Key Takeaways
- Why disciplined update operations are a revenue decision, not a maintenance task
- Depechecode handles the update lifecycle so you don’t have to
- Useful sources
- FAQ
How do you audit and prioritize pages that need updates?
Start with a sitemap crawl using Screaming Frog or Sitebulb. Export every URL to a spreadsheet with these fields: URL, page owner, last updated date, organic traffic (from GA4), conversion events, and index status from Google Search Console. That spreadsheet is your content inventory.
Once you have the list, score each page on four dimensions: business impact, traffic volume, technical risk, and ease of verification. A pricing page with broken schema and declining impressions scores high on all four. A blog post from 2019 with zero traffic scores low.
| Field | Source | Why It Matters |
|---|---|---|
| URL | Sitemap / crawl export | Unique identifier for tracking |
| Page owner | Internal team record | Accountability for updates |
| Last updated | CMS metadata / Wayback Machine | Flags stale content |
| Organic traffic | GA4 | Weights business priority |
| Conversion events | GA4 goals | Identifies revenue-critical pages |
| Index status | Google Search Console | Catches crawl or coverage issues |
High-value targets to surface first: homepage, pricing page, top-five landing pages by traffic, checkout flow, and any lead-gen form. These pages carry the most revenue risk when they go stale or break. Platform version histories and tools like the Wayback Machine can show you who changed what and when, which is useful during audits when CMS metadata is incomplete.
Pro Tip: Weight your priority scores with Search Console impressions and CTR alongside GA4 conversion events. A page losing impressions fast is a higher priority than raw traffic alone suggests.
How do you plan releases, assign owners, and set approval gates?
Every update should start with a ticket. Keep it lightweight: requestor name, change summary, reason for the change, risk level (low/medium/high), rollback owner, and a short test checklist. Formal approval workflows benefit from a document signing process for high-risk or compliance-sensitive changes.
Core roles for every release:
- Request owner: Writes the ticket and owns the business case
- Release owner: Coordinates staging, deploy timing, and sequencing
- QA reviewer: Runs functional and regression tests on staging
- SEO reviewer: Checks metadata, canonicals, and redirect integrity
- Rollback owner: Named person who executes rollback if verification fails
- Approver: Signs off before production deploy (can be the same as release owner for low-risk changes)
Clear ownership prevents the ambiguity that lets critical steps get skipped. When nobody owns rollback, nobody executes it fast enough.
Typical timeline for a content or SEO update:
- Ticket submitted and triaged (Day 1)
- Risk level assessed and approver assigned (Day 1–2)
- Changes applied to staging (Day 2–3)
- QA and SEO review completed (Day 3–4)
- Approver sign-off (Day 4–5)
- Production deploy during low-traffic window (Day 5–6)
- Verification and change log entry (Day 6)
For low-risk content edits, compress this to 2–3 days. For core, plugin, or theme updates, hold the full 5–6 day window. Batch small, frequent releases rather than large quarterly pushes. Smaller batches mean faster diagnosis when something breaks.
Pro Tip: Schedule high-risk deploys for Tuesday or Wednesday evenings. You get a full business day before the weekend if something needs a patch.

What does a professional deployment lifecycle look like?
The deployment lifecycle follows a strict sequence: Request → Backup (with restore test) → Staging → Deploy → Verify → Monitor → Document. Skipping any step, especially the restore test, turns a routine update into a gamble.
Pre-deploy checklist (run before every production push):
- Full backup of files and database completed
- Restore test passed on staging environment
- Rollback owner named in the ticket
- Content freeze confirmed (no parallel edits in production)
- Critical paths documented (checkout, forms, key landing pages)
Post-deploy checklist (run within 30 minutes of going live):
- Homepage and top landing pages load without errors
- Forms submit and trigger correct confirmation responses
- Checkout completes end-to-end (for e-commerce)
- Analytics tags fire correctly (verify in GA4 DebugView)
- Canonical tags and meta titles render as expected
- Mobile layout intact on at least two device sizes
- Uptime monitor shows green
| Phase | Key Action | Minimum Frequency |
|---|---|---|
| Backup | Full file + database backup | Before every deploy |
| Restore test | Restore to staging, validate flows | Monthly |
| Staging test | Functional, SEO, performance checks | Every release |
| Post-deploy verify | Critical paths + analytics | Within 30 minutes |
| Change log entry | Date, owner, summary, results | Every release |
A staging environment should replicate production closely, including the same tracking setup, redirects, and server configuration. Tests on a staging environment that differs from production expose the wrong problems and miss the real ones.
Pro Tip: Never stack core, plugin, and theme changes into a single deployment. Separate them into sequential batches so a failure points to exactly one cause and rollback is surgical, not a full revert.
What should you check before publishing any site change?
Pre-launch SEO checks catch the failures that hurt rankings and user experience before anyone else sees them. Run this list before every production push.
SEO and publishing checklist:
- Title tag and meta description match the intended content and length (50–60 characters for title, 150–160 for description)
- Canonical tag points to the correct URL, not a staging domain
- Robots.txt has not accidentally blocked the updated page
- XML sitemap updated and submitted to Google Search Console
- Structured data (schema) validates in Google’s Rich Results Test
- Hreflang tags correct if the site serves multiple languages or regions
- All redirects mapped before launch and tested after deploy (use a redirect checker)
- Cache purged at the CDN level after deploy (Cloudflare, Fastly, or your host’s cache panel)
- URL slugs unchanged unless a redirect is in place and tested
Keep slugs stable. Changing a URL without a 301 redirect destroys the page’s link equity and drops it from rankings. A website redesign checklist covers the full SEO preservation protocol for larger changes.
Pro Tip: Purge cache in the smallest scope possible. Purging the entire CDN after a single blog post update causes unnecessary cache misses and temporary performance dips. Target the specific URL or path.
How do you monitor updates and measure their impact?
The first 30–60 minutes after a deploy are the highest-risk window. Check uptime, error rates, and critical conversion paths immediately. Do not wait for a daily report.

Monitoring tools by use case:
| Tool | Use Case | Alert Type |
|---|---|---|
| UptimeRobot / Better Uptime | Uptime and response time | SMS / email on downtime |
| Sentry | JavaScript and server errors | Real-time error alerts |
| Google Search Console | Index coverage, Core Web Vitals | Weekly digest + manual check |
| GA4 | Conversion events, user paths | Custom alerts on drop |
| Distill Web Monitor | Page change detection | Browser alert on content change |
Monitoring tools and browser-based services provide instant alerts when a page changes unexpectedly, which is useful for catching unintended edits or cache-serving stale content. Set up a GA4 custom alert that fires when a key conversion event drops significantly day-over-day. That threshold catches real regressions without flooding your inbox with noise.
Over the first seven days post-deploy, track: organic impressions and CTR in Search Console for affected pages, Core Web Vitals scores (especially Largest Contentful Paint and Cumulative Layout Shift), form submission rates, and any Sentry error spikes. If a metric falls outside its normal range and the change log confirms a recent deploy, that is your rollback trigger.
Assign a named person to receive monitoring alerts. An alert that goes to a shared inbox gets ignored.
Which tools and automation workflows actually scale maintenance?
Automation handles the repeatable work. Human review handles judgment calls. The distinction matters because automating content updates without editorial oversight produces SEO drift and brand inconsistency.
Where to automate:
- Scheduled backups (daily incremental, weekly full)
- Uptime and response-time monitoring with SMS alerts
- Security scans for malware and vulnerability signatures
- Dependency update notifications (WordPress plugins, npm packages)
- Broken link checks on a weekly crawl schedule
Where to require human review:
- Content edits and new copy
- Metadata and SEO changes
- Design or layout modifications
- Any change touching a conversion path
Tool categories and recommended options:
- Backups with restore testing: UpdraftPlus (WordPress), BackupBuddy, or your host’s snapshot tool
- Uptime monitoring: UptimeRobot, Better Uptime, or Pingdom
- Error tracking: Sentry or Datadog for JavaScript and server errors
- Deployment management: WP Engine’s staging push, DeployHQ, or GitHub Actions for code-based sites
- Content inventory and crawling: Screaming Frog, Sitebulb, or Ahrefs Site Audit
- Collaboration and ticketing: Notion, Jira, ClickUp, or Linear for ticket templates and change logs
- SEO monitoring: Clearscope for content quality scoring, Google Search Console for coverage and performance
Clearscope is worth calling out specifically for content updates. It scores existing pages against top-ranking content and flags gaps before you publish, which reduces the chance of a content update that hurts rather than helps rankings.
Explore maintenance tracking software options if your team manages updates across multiple sites or properties. Centralized tracking prevents the version-confusion that happens when updates are managed in email threads.
Pro Tip: Automate the technical checks, but put a human gate on every content or SEO update. A plugin update that breaks a form is recoverable in minutes. A metadata change that tanks rankings takes weeks to diagnose.
What does a ready-to-use update checklist look like?
Copy this directly into Notion, Jira, or ClickUp.
Pre-deploy:
- [ ] Ticket created with risk level and rollback owner named
- [ ] Full backup completed and restore test passed
- [ ] Changes applied and tested on staging
- [ ] SEO checks completed (title, canonical, robots, redirects)
- [ ] Approver sign-off received
- [ ] Content freeze confirmed in production
Deploy:
- [ ] Deploy executed during low-traffic window
- [ ] Cache purged at CDN level
- [ ] Staging environment reverted or flagged as post-deploy
Post-deploy:
- [ ] Uptime confirmed green within 5 minutes
- [ ] Critical paths tested (homepage, forms, checkout)
- [ ] Analytics tags verified in GA4 DebugView
- [ ] Change log entry completed
Ticket template fields:
| Field | Example Value |
|---|---|
| Requestor | Jane Smith, Marketing |
| Change summary | Update pricing page copy and add FAQ schema |
| Reason | Q2 pricing change and CTR improvement |
| Risk level | Medium |
| Rollback owner | Dev lead (Tom R.) |
| Test checklist | Pricing page loads, schema validates, no errors |
Change log template fields: Date, release owner, change summary, pages affected, rollback steps, verification results, and sign-off name. Store these in a shared Notion database or a Jira project wiki so every team member can find the history without asking.
How should you handle security during website updates?
Security patches are the highest-priority update category. A known vulnerability with a public exploit does not wait for your next scheduled release window. Treat critical security patches as emergency deploys with an abbreviated but still-complete lifecycle: backup, stage, test, deploy, verify.
Run a vulnerability assessment before and after major updates using tools like WPScan (for WordPress), Sucuri SiteCheck, or Qualys. These scanners flag outdated dependencies, exposed configuration files, and known CVEs before an attacker does. Schedule automated scans weekly and review results manually monthly.
Patch management means keeping a dependency register: every plugin, theme, library, and framework your site uses, with its current version and the latest available version. Review this register weekly. When a security release drops, cross-reference it against your register and prioritize accordingly.
One often-skipped step: after a security update, verify that the patch did not alter any access controls, user roles, or authentication flows. A plugin update that silently changes a permission setting is a security regression, not a fix.
How do you keep stakeholders informed during the update process?
Stakeholder communication during updates follows a simple rule: tell people what is changing, when it is changing, and what to do if something looks wrong. Silence breeds confusion and duplicate reports.
Before a deploy, send a brief notice to affected teams: what is being updated, the deploy window, and who to contact if they spot an issue. For high-risk changes, include a rollback timeline so stakeholders know how long a revert takes if needed.
During the deploy window, keep a live status channel open, whether that is a Slack thread, a status page (Statuspage.io works well), or a shared Google Doc. Post a “deploy started” message and a “deploy complete, verification in progress” message. Those two updates alone cut the number of “is it done yet?” interruptions by a significant margin.
After verification, send a short close-out note: what changed, what was verified, and any known follow-up items. Attach a link to the change log entry. Stakeholders who can see the history trust the process more than those who receive only verbal updates.
What are the best practices for version control and change tracking?
Version control for code belongs in Git, full stop. Every code change should live in a repository (GitHub, GitLab, or Bitbucket), committed with a descriptive message, and reviewed via a pull request before merging to the main branch. This gives you a complete, reversible history of every file change with timestamps and author attribution.
Content version control is less standardized but equally important. WordPress stores post revisions natively; use them. For content outside the CMS, keep a change log in your project management tool with the fields from the template above. Tools like Clearscope track content score changes over time, which doubles as a content performance history.
For teams managing multiple environments (development, staging, production), use branch-based deployment: feature branches merge to a staging branch, staging merges to production only after verification. This prevents untested code from reaching users and gives you a clean rollback path by reverting the merge.
Tag every production release in Git with a version number and release date. When an incident occurs, you can identify exactly which release introduced the problem without digging through commit logs.
What is your contingency plan when an update fails?
Define your rollback trigger before you deploy, not after something breaks. A clear trigger removes the hesitation that costs time during an incident. Common triggers: uptime drops below 99%, a critical conversion path returns an error, or a key GA4 event stops firing within 30 minutes of deploy.
Incident response steps:
- Detect: monitoring alert fires or a team member reports an issue
- Assess: confirm the issue is deploy-related by checking the change log and error logs
- Decide: rollback or patch forward (rollback if the cause is unclear; patch forward only if the fix is simple and tested)
- Execute: rollback owner restores the last known-good backup or reverts the Git merge
- Verify: run the post-deploy checklist against the restored state
- Communicate: notify stakeholders with a brief incident summary
- Document: write a post-incident note in the change log with root cause and prevention steps
Keep your rollback steps written in the ticket before you deploy. A rollback plan you write during an incident is slower and more error-prone than one you wrote when calm. The deployment lifecycle principle of smaller, sequential releases applies directly here: when each batch is small, rollback is surgical and fast.
Key Takeaways
A disciplined update process, from inventory through incident response, is the single most reliable way to protect site revenue, rankings, and user trust.
| Point | Details |
|---|---|
| Start with a content inventory | Crawl your sitemap, export to a spreadsheet, and score pages by traffic, conversions, and technical risk. |
| Assign owners before every deploy | Name a rollback owner, QA reviewer, and approver in the ticket before any change touches production. |
| Test restores, not just backups | Run a monthly restore test to staging to confirm your backup is actually usable when you need it. |
| Use small, sequential releases | Separate core, plugin, theme, and content changes into individual deploys to speed diagnosis and rollback. |
| Depechecode manages the full lifecycle | Depechecode’s WordPress maintenance plans cover backups, restore testing, staged deployments, and monthly audits. |
Why disciplined update operations are a revenue decision, not a maintenance task
Most teams treat website updates as housekeeping. That framing is the problem. Every unplanned outage, broken form, or ranking drop caused by a careless deploy is a direct revenue event. The homepage that returns a 500 error during a campaign launch does not just inconvenience visitors; it erases the spend that drove them there.
The lifecycle in this guide is not bureaucracy. It is the minimum structure needed to make updates predictable. Proactive maintenance preserves brand trust and search visibility in ways that reactive fixes never fully recover. A site that breaks and gets fixed still carries the reputational cost of having broken.
Depechecode’s approach to managed maintenance reflects this directly. The agency-grade processes described here, including staged deployments, restore-tested backups, and post-deploy verification windows, are the same ones Depechecode applies for clients who need their sites to perform reliably without managing the operations themselves. Adopting this lifecycle, whether in-house or through a partner, is the difference between a site that grows and one that quietly erodes.
Depechecode handles the update lifecycle so you don’t have to
Keeping a site current, secure, and performing well is a full-time operational commitment. Depechecode’s managed website maintenance and website design and development services cover the entire lifecycle described in this guide: weekly security updates with restore-tested backups, staged deployments with pre- and post-deploy verification, and monthly content and technical audits.

For businesses that need their site to generate leads and revenue without dedicating internal resources to update operations, Depechecode provides a done-for-you alternative. Services include WordPress maintenance plans with automated backups and manual restore verification, staged deployment workflows, and SEO monitoring tied to search engine optimization plans that track ranking impact after every content update. Contact Depechecode to get a maintenance assessment and a clear plan for your site.
Useful sources
- Business Website Management: Tools, Processes, and Checklists (2026 Guide) — Middlehost: Covers daily, weekly, monthly, and quarterly maintenance cadences, restore testing, and deployment checklists.
- How to Update a Website Safely in 2026 — Trysight: Deployment sequencing, pre-launch checklists, and rollback planning for production sites.
- Website Maintenance 101 — Webflow Blog: Agency perspective on maintenance as a proactive brand and revenue protection strategy.
- How to Maintain Your Website — HubSpot Blog: Automation vs. human review framework for scaling maintenance operations.
- How to Check When a Website Was Last Updated — Dynamic Sales Solutions: Methods for auditing update history using platform version histories and archive tools.
- Distill Web Monitor — Chrome Web Store: Browser-based tool for monitoring page changes and receiving instant alerts.
- Website Redesign Cost Guide — 310 Creative: Scope-based cost ranges for redesigns and major updates, useful for stakeholder budgeting.
FAQ
Is there a way to monitor a website for changes?
Yes. Browser-based tools like Distill Web Monitor send instant alerts when a page’s content changes, and the Internet Archive’s Wayback Machine lets you inspect historical snapshots to compare versions over time.
How can you tell how often a website is updated?
Check the CMS revision history, platform version logs, or use the Wayback Machine to compare archived snapshots across dates. Google Search Console’s coverage and performance reports also show when indexed content last changed.
How much does it cost to have someone update your website?
Costs vary widely by scope. A basic redesign or major update typically involves a substantial amount depending on site size and complexity, while ongoing managed maintenance plans run at a monthly retainer set by the agency. Depechecode offers maintenance plans sized for both small and large businesses.
How do you see the history of website changes?
For code, Git commit history in GitHub or GitLab shows every file change with author and timestamp. For content, most CMS platforms including WordPress store post revisions natively. A structured change log in Notion or Jira gives teams a single source of truth across both code and content changes.
Recommended
Related Articles

Depeche Code
April 11, 2026